This is a follow up to my last two Crafty.js posts which you can find in part 1 and part 2 in those links, which covered the basics of getting started with Crafty.js. At the end of part 2, I finished a mini game which I created and implemented in about an hour. The idea is simple enough. You have a character block that needs to make it to the end of a pouring rain scene without getting hit by rain drops more than 'x' amount of times. In this part 3, I'm going to add a few more complex elements to that same game. Crafty is a pretty flexible engine, and best of all it's built entirely in JavaScript, which means no messy installs of game engines and IDE's. You can just open up notepad and start typing.
This time around, I'm going to be adding a new title screen and I'm going to improve upon the original gameplay by extending the level past the visible viewport. The home screen will just have 1 button pretty much, but it'll show how in Crafty you can jump around from scene to scene. And the longer level will give it more of a platformer feel to the whole thing. So hopefully, I can show with how just a few lines of code you can make a pretty complex playing game, even if it is just one character avoiding obstacles.
Let's add a home screen
And for that I will be using Scenes. Scenes are used to organize your game in Crafty.js and they follow a few rules which you will need to remember. Scenes are a configuration of components and entities inside of your actual screen at any one time. When once scene begins, the previous one ends. When a new scene begins, the old scene is removed along with all of its 2D entities and the viewport will also reset itself to the default size, which is super important to remember. So if you're viewport size does change for any reasons during a scene, be sure to update it for the next. If we want however, we can have previous scenes persist, and you can do that by adding the Persist component to your scene entities. Sounds perfect for our home screen and we won't be needing it to persist anything here, but if for example you had a score keeper in the upper left corner that you wanted to remain for the level, you can certainly set it to persist.
Creating new scenes using Crafty.js is actually a relatively simple process. Crafty provides the defineScene method, which accepts a name and a function as parameters, with a third optional parameter that is also a function. The second parameter is the function to call when the scene is first being created, and the third parameter which is optional, is the function to call when the scene is done being created. So I'm going to be defining all of my scenes first and then "starting" them appropriately with certain even triggers in the game. But first, here is a quick example of a basic scene being defined.
Crafty.defineScene("HomeScreen", function(){
    Crafty.e("2D, DOM, Text")
        .attr({w: 100, h: 20, x: 100, y: 100})
        .text("Click start to begin");

    Crafty.e("Exit, 2D, Canvas, Color, Solid, Text, Mouse")
        .attr({x: 200, y: 200, w: 100, h: 40})
        .text("Exit")
        .bind("Click", function(MouseEvent){
             // exit the game
        });
});
This snippet of code would just define our scene, and specify which entities to create when it runs, it wouldn't render anything just yet however. In order to tell Crafty to draw our scene we have to call the enterScene function, which takes as a parameter the name of the scene to load, in my case the "HomeScreen". So in short, we define our scenes, add functions to trigger when the scene starts, and when we're ready to call our scene, we use the enterScene method.
Crafty.enterScene("HomeScreen");
Similarly I would create another Scene for my level 1, which would create my character, floor entities, hit counter, etc. I declared the player entity outside of the scene, because I will need access to that entity later on when I determine the rain drop hit detection.
Crafty.defineScene("Level1", function(){
      Crafty.background("black");
      Crafty.e('Floor, 2D, Canvas, Solid, Color, Collision')
        .attr({x: 0, y: 380, w: levelWidth, h: 10})
        .color('white');

      player1 = Crafty.e('Player, 2D, Canvas, Color, Solid, Fourway, Gravity, Collision')
        .attr({x: 20, y: 0, w: 30, h: 30})
        .color('white')
        .fourway(200)
        .gravity('Floor')
        .checkHits('Floor')
        .bind("Moved", function(){
          if (this.x >= (screenWidth / 2))
          {
            Crafty.viewport.x = (this.x - (screenWidth / 2)) * -1;
          }
        });
    });
A little about the viewport
The second part of this series of updates that I'm implementing is increasing the size of the games main scene. In the original, once the character block reached the end of the screens visible edge, the level ended. Now I'm going to set the level width to be twice as long, which means a portion of it won't be visible right off the bat. And this is where knowing about the Crafty.viewport comes in handy.
What is the viewport?
You can think of the viewport as the 2D camera that's capturing the games events in front of your face. It's whatever you're currently looking at while you play the game. When your character moves to the right for example, eventually the camera is going to change and follow your character with it, otherwise your character would leave the edge of the screen and we'd never know what happened to them.
When we first start off, the Viewport is defaulted to 0, 0, which represents its top left coordinates. And its size is set to the size of our current scene. Those, however, are editable properties of the Crafty.viewport object.
The Viewport lies on your traditional x/y axis in which moving it right will increase the X value and moving it upwards will decrease the Y coordinates. For my particular game, I just want the X value to get updated. When my character reaches the midway point, which I'll quickly define as player.x >= screenWidth / 2, the Viewport will begin to follow our character, which means decreasing the x value, since our scene is moving farther into the left as we push right. We can handle this logic in the players "Moved" method, which we can bind to our player entity as is shown down below.
player1 = Crafty.e('Player, 2D, Canvas, Color, Solid, Fourway, Gravity, Collision')
        .attr({x: 20, y: 0, w: 30, h: 30})
        .color('#000')
        .fourway(200)
        .gravity('Floor')
        .checkHits('Floor')
        .bind("Moved", function(){
          if (this.x >= (screenWidth / 2))
          {
            Crafty.viewport.x = (this.x - (screenWidth / 2)) * -1;
          }
        });
There are many different ways to go about doing this, but personally, I'm just going to go the easiest route for me and set the Viewport's X value to the current characters x position, subtracting the halfway point on the screen, and negating the whole value, so that the viewport follows left and not right, since we want to leave our level behind us.
It's a very quick implementation, and it doesn't cover all angles really, but it does the job for this example. For any 2D platform game, the viewform is super important to grasp, as maybe you'll need your character to climb higher and higher, or to negative levels down below. And all of this requires you to control the visible playing field.
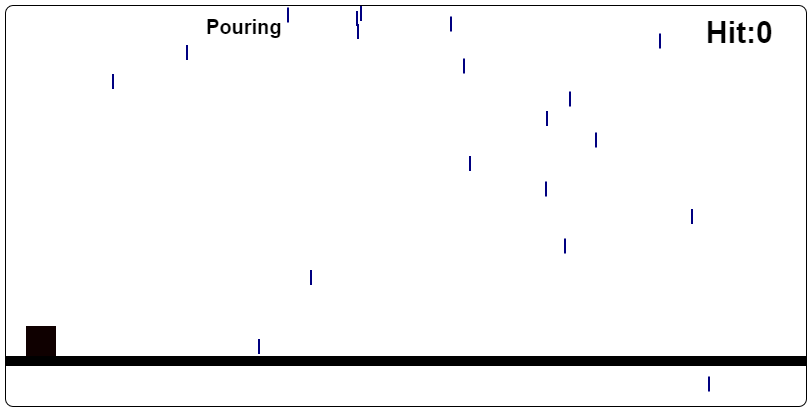
Crafty.js offers a ton of built in viewport functionality that makes the whole process a lot simpler for game developers. You can manipulate the viewport in a variety of ways. You can pan, scroll, follow and manually adjust it yourself. Here's a quick sample of my game so far, minus the actual hit mechanics, which you can find in part 2. But since I just want to show the Viewport following our character, this should be enough.
It's a very quick example, but it shows that with just a few lines of code you can create a semi side scroller game with varying scenes. That's all for this part of the post, but in the next I'll be talking about a few more complex scenarios and I'll cover how to add sound and some simple animations to the whole thing.
View Full Source
<html>
  <head>
  </head>
  <body>
    <div id="game" style="margin:0 auto;"></div>
    <script type="text/javascript" src="https://rawgithub.com/craftyjs/Crafty/release/dist/crafty-min.js"></script>
    <script>
    var screenWidth = 800;
    var screenHeight = 400;
    var hitCounter = 0;
    var player1;
    var levelWidth = 1600;

    Crafty.init(screenWidth,screenHeight, document.getElementById('game'));

    Crafty.defineScene("HomeScreen", function() {
      Crafty.background("#000");
      Crafty.e("2D, DOM, Text, Mouse")
          .attr({ w: 300, h: 20, x: 100, y: 200 })
          .text("Click to start")
          .css({ "text-align": "center"})
          .textFont({size: '20px', weight: 'bold'})
          .textColor("#FFFFFF")
          .bind('Click', function(MouseEvent){
            Crafty.enterScene("Level1");
          });

          Crafty.e("2D, DOM, Text")
          .attr({ w:400, h:40, x: 50, y: 50})
          .text("Rein")
          .textFont({size:'130px', weight:'bold'})
          .css({"text-align": "center"})
          .textColor("#FFFFFF");
      });

    Crafty.defineScene("Level1", function(){
      Crafty.background("black");
      Crafty.e('Floor, 2D, Canvas, Solid, Color, Collision')
        .attr({x: 0, y: 380, w: levelWidth, h: 10})
        .color('white');

      player1 = Crafty.e('Player, 2D, Canvas, Color, Solid, Fourway, Gravity, Collision')
        .attr({x: 20, y: 0, w: 30, h: 30})
        .color('white')
        .fourway(200)
        .gravity('Floor')
        .checkHits('Floor')
        .bind("Moved", function(){
          if (this.x >= (screenWidth / 2))
          {
            Crafty.viewport.x = (this.x - (screenWidth / 2)) * -1;
          }
        });
    });

Crafty.enterScene("HomeScreen");

function drop()
{
    var randomx = Math.floor((Math.random() * screenWidth) + 50);
    Crafty.e('Drop, 2D, Canvas, Color, Solid, Gravity, Collision')
        .attr({x: randomx, y: 0, w: 2, h: 15})
        .color('#FFFFFF')
        .gravity()
        .checkHits('Player')
        .bind("HitOn", function(){
            this.destroy();
        })
        .bind("EnterFrame", function() {
            if (this.y > screenHeight)
              this.destroy();
        });
}

Crafty.bind("EnterFrame", function(){
  if (Crafty.frame() % 2 == 0)
    drop();
});
    </script>

  </body>
</html>