There are a million options when it comes to setting up and creating your first blog. You have everything from out-of-the-box solutions, such as WordPress and Wix, to blogging frameworks like Ghost and Jekyll to custom implementations. Each of these methods has their own pros and cons and their own set of complexities.
This guide however is for those looking to setup a blog in 5 minutes or less. For the person that is more interested in the blogging part and less so on the behind the scenes technical parts, such as setting up databases, configuring servers and creating user authentication systems.
In this guide I'll cover purchasing a domain name from Google Domains, setting up a shared server to host your new blog on SiteGround, creating your pre-built blog and configuring your DNS records to point to your live domain.
Getting a domain name
Ideally you want to have a single location where you can direct your users to showcase your blog. So before anything, pick a good domain name. Why do I mean by good? You want a domain that follows the following guidelines:
- Uses real words
- Avoid too many dashes
- Memorable
- The shorter the better
- Use your name if possible (walterguevara.com)
Here are some bad examples for a domain:
- www.this-is-a-bad-domain.com
- www.blogging23943.com
- www.thablogdude.com
That last one isn't that bad. But essentially, none of those were memorable and there is a good chance that if you tell anyone, they'll forget relatively quickly. Here are better alternatives as examples.
- www.yourname.com
- www.waltergcodes.com
- www.thatsoftwaredude.com
- www.walterguevara.com
More memorable and less symbology is the key here. But also have fun with it. I chose thatsoftwaredude.com as my blog's domain name because I wanted to make fun of the fact that nobody really knows what I do as a programmer. Some people think I do math, other's think I drag around shapes. So I was just that software dude.
You have several options when it comes to getting a domain name. I personally use Google Domains mainly because of the ease of use and because they offer free privacy protection. It's also Google, so you can assume that they are a legitimate domain registrar. So head on over to domains.google.com and search until you find something that resonates with you.
Important note! I'll mention now that down below in the "Finding a good host" section of this article, some hosting companies will typically offer to sell you a domain as well or they might even give you a free domain for a year.
While you can also take that option, most do not offer free privacy protection and after the year is up will charge you a higher rate than Google Domains plus will charge you for privacy protection. That free domain now, might end up costing you 3 times more per year after.
If you are lucky, you will see the following after your search. An exact match! And yes, the cost is $12 per year which you can set to auto-renew so you never actually have to think about it. Until you find yourself writing a blog post on domains.
If however, you can't find the exact match, you might also want to consider using a different extension aside from .com. Depending on the extension you choose, you might end up paying more than 12$.
Note that there is no real negative impact from having a non .com domain, aside from the fact that most of the world is probably already programmed to check .com first.
Once you find a match, add it to the cart and it is time to check out. Again, one of the benefits of using Google Domains is that that they throw in privacy protection at no extra cost. Many other registrars will charge you from $10 to $20 dollars more for this feature. This means that when someone looks for the owner of a particular domain, your personal information (address and name) won't be shown to them. They will instead see an intermediary that they can contact if they want more information.
Also note that auto-renew is on by default. And this should probably not be touched. If for any reason you don't have it on and the expiration date arrives, then someone could easily buy your domain for themselves and you can say goodbye to your brand.
Also note that you have the option of setting up G Suite Basic for your new domain at this time. This will link your domain to a Gmail email account along with Google Drive storage. It is optional and can also be set up at a later time.
Set up your hosting
Note that I am a SiteGround affiliate, which means that I may or may not earn a small commission if you sign up using my recommended link. And that I would not recommend something that I would not use myself.
Now that you have a catchy domain name, it is time to find a good hosting service to store your blog. For those brand new to servers or domains, a hosting service such as SiteGround essentially allocate out space on their servers to you at a monthly cost.
I am a fan of SiteGround because of the quality of the hosting and the ease of use on the site. And that's important when managing server settings, databases and file permissions. The customer service is pretty good and they offer a month-to-month payment option, although at a higher cost which we'll get to down below.
Head on over to the SiteGround plan page and check out the various options that they have to offer.
If your only plan is to have a single site to host your blog, then the StartUp plan should do just fine. However, if you have plans for other projects, websites, or even other blogs, then the GrowBig plan might be more suitable as it doubles the amount of data that you can store on the server and allows your to setup as many websites as you'd like.
SiteGround offers the option of registering a new domain when you sign up as well. The yearly cost is slightly higher than Google Domains however and they do not offer free privacy protection like Google does. It comes at an added fee.
My suggestion here would be to purchase the domain on Google Domains and to select the "I already have a Domain" option when registering on SiteGround. If you are just starting off and trying to be budget friendly this would be my suggestion.
You can always configure your domain to work with any hosting provider later on, which we'll go into detail down below.
The last step in acquiring your new hosting service is to checkout. A few notes here as well. The yearly plans come at a considerable discount when compared to the month-to-month option.
If you are just testing out your blog idea then it might make sense to just pay for a single month in order to just gauge your progress and then upgrade later.
Signing up for a 12 month plan though could cut the price down by as much as 50%. So budget accordingly.
Once you finish checking out, you are good to go. Next up, it's time to actually create your blog.
Create your website
Setting up a new website is relatively easy on SiteGround and should take you no more than 5 minutes. From your dashboard, head on over to the Websites tab and, if you have purchased your domain from Google Domains as mentioned above, then select the "Existing Domain" option.
Once you make your selection, you'll have a few options of what to create as far as a website is concerned. SiteGround offers users the WordPress Starter kit to get you up and running with a few clicks.
Click on the Start New Website link and on the following page select WordPress as the application of choice to install. Once you have that up and running, you will see the following welcome page.
Next up, choose one of the many predefined templates:
Once you click on the Finish button, you are good to go as far as creating your website. For those that enjoy knowing what is happening under the engine, SiteGround is essentially creating a directory for your website on one of their servers. They are also configuring this server to serve files to the public.
Your website isn't quite live just yet however. The next step will handle that.
Configure your DNS
If you followed this guide so far, then you have probably purchased your domain from Google Domains (unless you already have a domain ready to use from another registrar) and your new hosting account from SiteGround. So you will need to "link" them up in some way.
You can do that by pointing the domain to the correct nameservers given to you by SiteGround. Not as difficult as it may sound and you don't even have to know what a nameserver is.
The first thing that you will want to do is to head on over to your Google Domains dashboard where each of your domains is listed and to click on the "Manage" link that appears to the right of your domain.
In the Management page that follows, jump to the DNS section on the left navigation bar.
You can ignore most of what is in the DNS page as it is beyond the scope of this article. There is only one area that you need to focus on and that is the "Name servers". Select the custom name servers option in the given options.
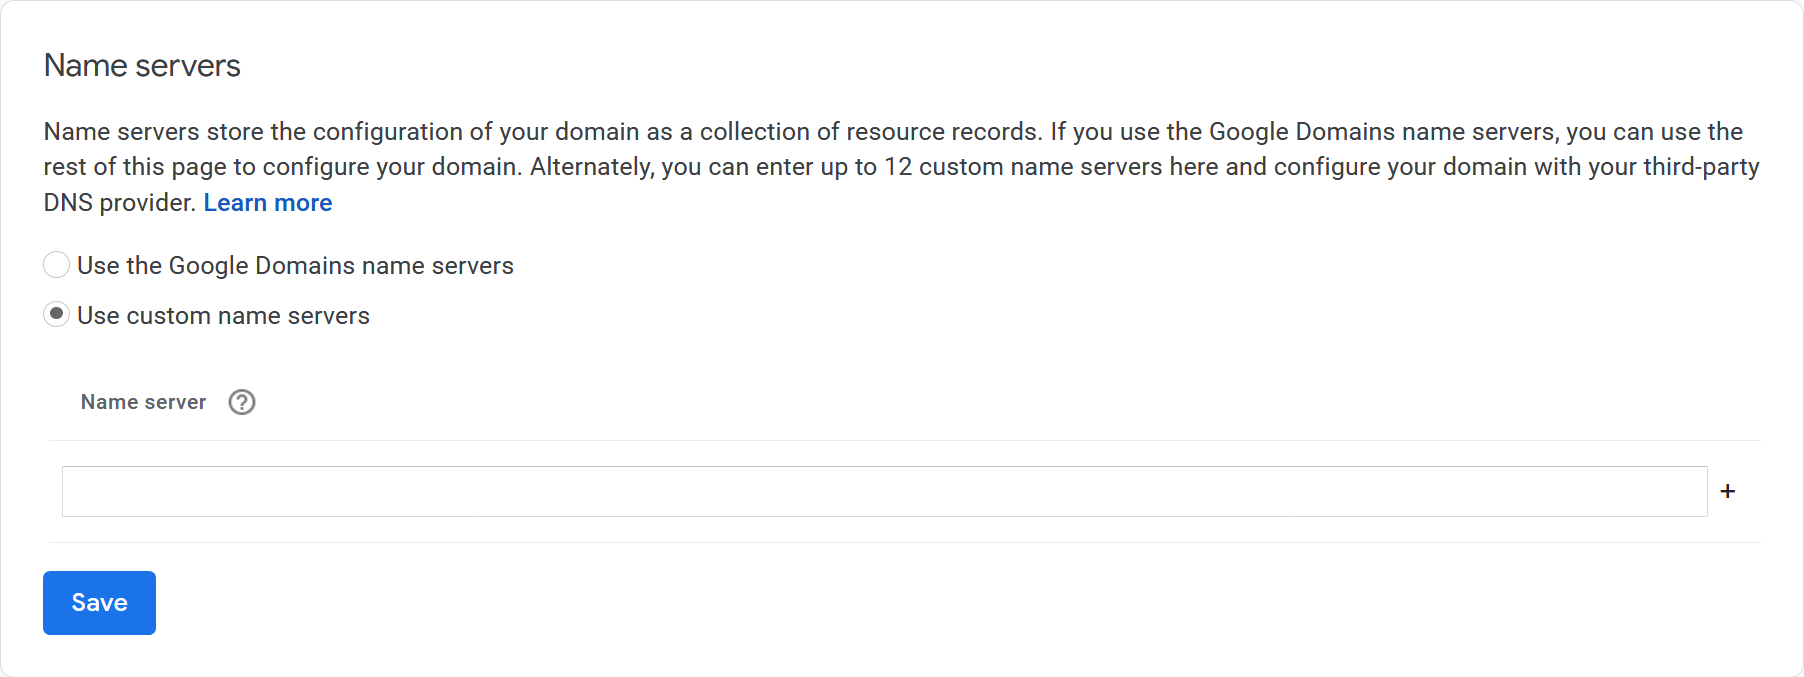
In the custom name servers area, you'll want to enter your websites new nameservers given to you on SiteGround. If you open up the website panel on your SiteGround dashboard, you will see the following information area.
You should see 2 name server URL's pertaining to your website circled above. I have edited them out for the screenshot, but you should see 2 URL's pertaining to your particular account. These are the ones that you will want to enter in the Google Domains custom name server box. Once you hit save on Google Domains, you are good to go.
Note that most domain registrars will tell that you have to wait from 24-48 hours for DNS records to properly propagate. While this is true, you should start to see your domain loading properly typically within minutes of configuring the DNS.
Test
And lastly, it's time to test to ensure that the site looks exactly how you'd like it to and that every page is loading appropriately.
This is a good time to make any template changes if you need to and to install any WordPress addons from the marketplace. These could include any performance improvement addons as well as SEO related modules.
And lastly, it's time to start writing. Typically, your first content is the hardest to write for a variety of reasons. You might not have your online "voice" just yet and that could take some months to dial in and figure out. But at least at this stage, you have gotten the more challenging part of setting everything up out of the way.