
The action bar that is. A very important part of almost any Android application, the Action Bar lives at the top of most applications and it makes the most related and important tasks visible. It also allows any other app actions that you may have real estate within the action overflow area. By default the Action Bar displays the name of the current Activity and the app's icon next to it. And if we're on any Activity but the home Activity, it also gives us an Up button to get back to the parent.
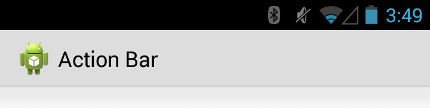
Default Action Bar
Enabling The Action Bar
If you are using Android 3.0 (or API level 11) or above, then by default all Activities using the Theme.Holo theme (or one of its descendants) will receive the Action Bar. So just target the minSdkVersion to be above 11 in your manifest file and you are good to go.
<manifest ... >
    <uses-sdk android:minSdkVersion="11" ... />
    ...
</manifest>
And that's pretty much it. Run your application and you'll notice a nifty little Action Bar on each Activity, but not much else, just yet.
Adding Action Buttons
Buttons that are displayed on the Action Bar are Action Buttons. Less important buttons, or buttons that just can't fit in the given area are automatically placed into the action overflow (the 3 vertical dots).
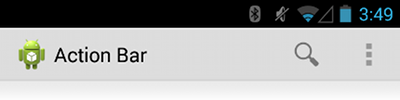
Action buttons on the right
In order to add buttons to our Action Bar we must first define these items in a resource file. Let us navigate to the res/menu directory and create a new menu resource file.
<menu xmlns:android="http://schemas.android.com/apk/res/android" >
    <item android:id="@+id/action_search"
          android:icon="@drawable/ic_action_search"
          android:title="@string/action_search"
          android:showAsAction="ifRoom" />

    <item android:id="@+id/action_settings"
          android:title="@string/action_settings"
          android:showAsAction="never" />
</menu>
For each item we define we set the the id, icon, title and the very special showAsAction which determines if the item will display right on the Action Bar, or if it will end up in the overflow. By default any items not specified with the location will end up in the overflow.
The icon is an image that you've saved onto your res/drawable directory. At a minimum you should have these 4 properties in your menu Action Button declaration.
Add The Items To Your Action Bar
At this point, we should have the default Action Bar on each of our Activities and a menu resource file defining what buttons our Action Bar will take. Now we need to link the two together. In our current Activity, we'll need to override the onCreateOptionsMenu function and inflate it with the resource file.
@Override
public boolean onCreateOptionsMenu(Menu menu) {
    // Inflate the menu items for use in the action bar
    MenuInflater inflater = getMenuInflater();
    inflater.inflate(R.menu.main_activity_actions, menu);
    return super.onCreateOptionsMenu(menu);
}
Responding To Clicks
Because showing a button is half the battle. We now have to respond to the user clicks on these Action Buttons. Whenever a click is registered for an Action Button, your Activities onOptionsItemSelected() function gets called. Within this function we can call the getItemId() on the given MenuItem, which will return the id that we used when we declared our items in our xml resource file up above. We're going to want it to end up looking something like this.
@Override
public boolean onOptionsItemSelected(MenuItem item) {
    // Handle presses on the action bar items
    switch (item.getItemId()) {
        case R.id.action_search:
            openSearch();
            return true;
        case R.id.action_settings:
            openSettings();
            return true;
        default:
            return super.onOptionsItemSelected(item);
    }
}
That's pretty much as far as I got with the Action Bar. You can dive in further, by styling the Action Bar any way that you want or by having multiple Action Bar's per Activity, but this should be enough to get started on a project. Just a recap. Make sure that the minimum SDK targeted is 11 then create a new menu resource xml file with the items that you want in your Action Bar. Inflate the bar in your Activitie's overwritten onCreateOptionsMenu method. And lastly respond to your buttons clicks with the onOptionsItemSelected method, and you are good to go.
Up next in part 4, I'll get to some coding in some way, shape or form.
Stay Sharp. Weekly Insights.
New posts, framework updates and weekly software conversations.
No spam. Unsubscribe anytime.
Walt is a software engineer, startup founder and previous mentor for a coding bootcamp. He has been creating software for the past 20+ years.